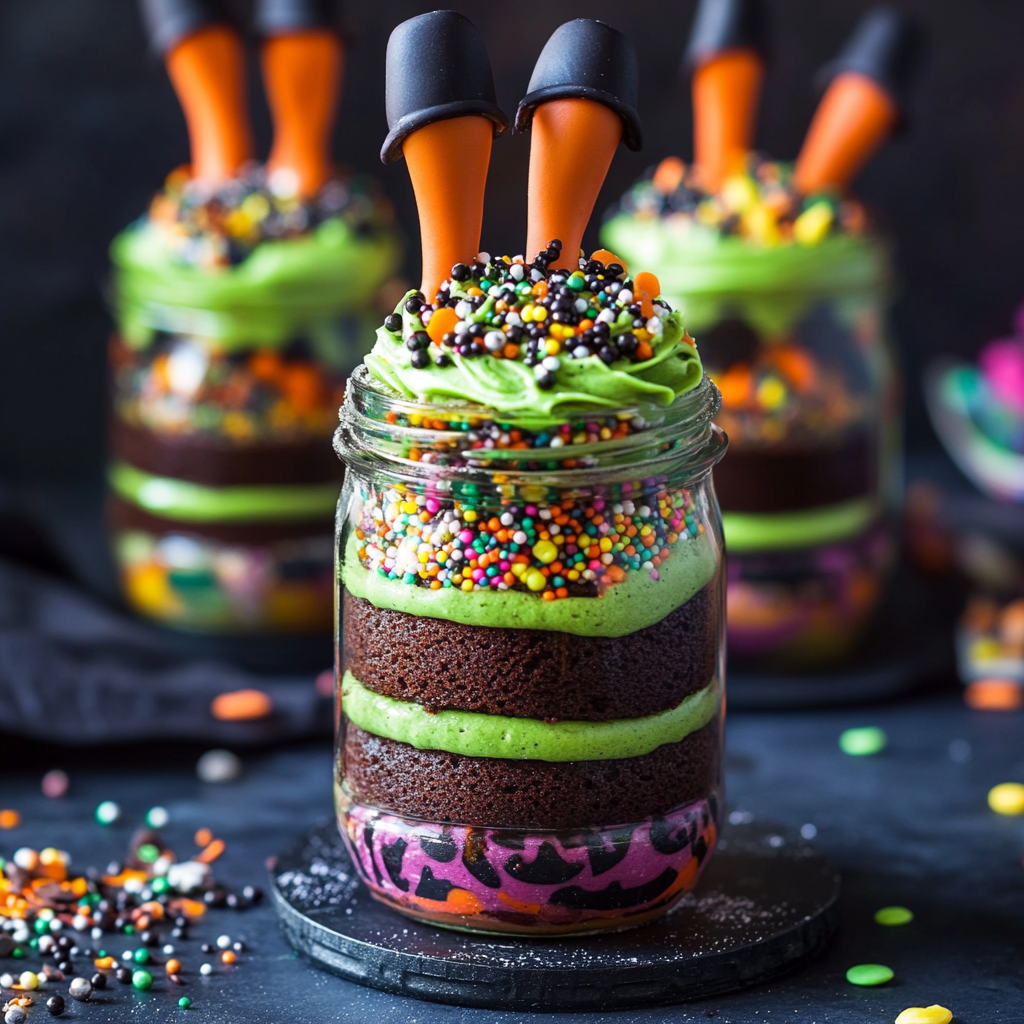
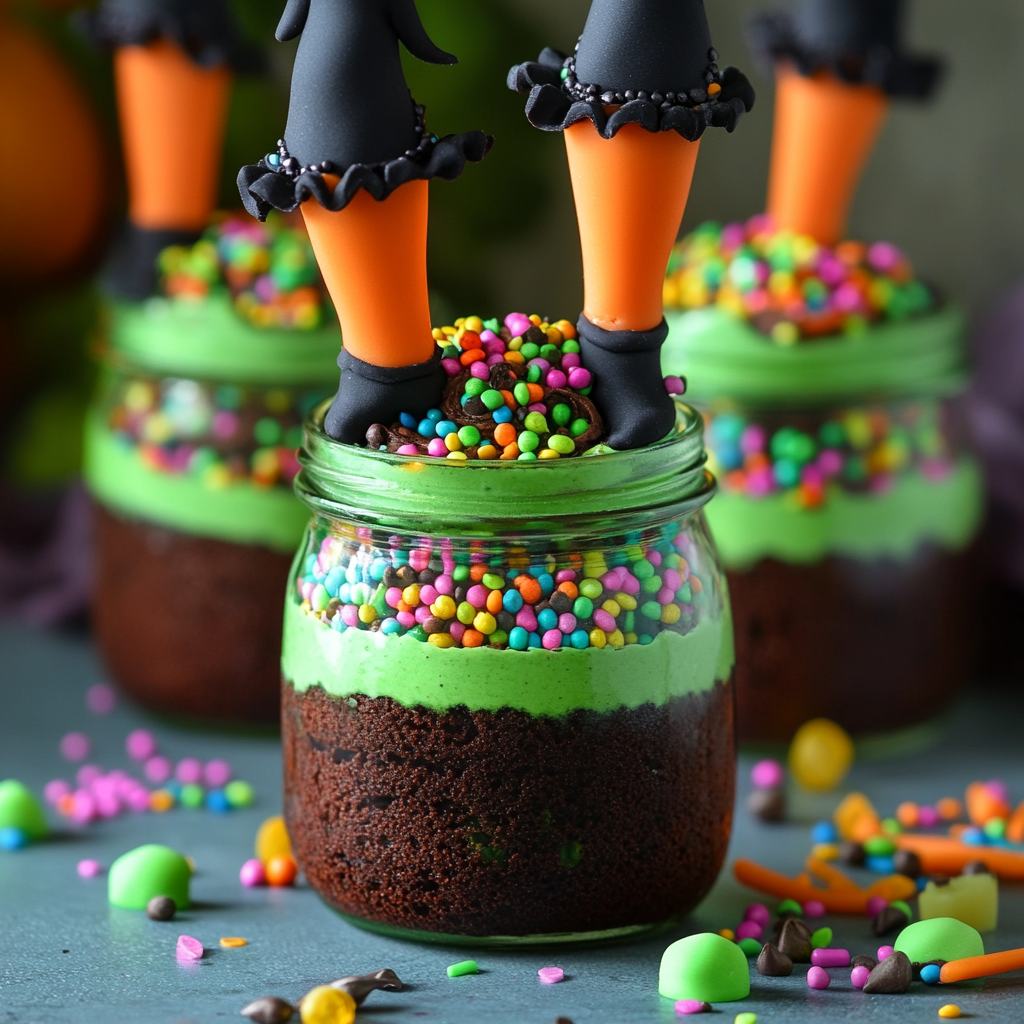
Witches Brew Halloween Cake Jars
Get ready for Halloween fun with these Witches Brew Halloween Cake Jars! These delightful treats are perfect for spooky gatherings, parties, or just to enjoy at home. Each jar is filled with layers of rich chocolate cake and vibrant green buttercream, making them not only delicious but also visually stunning. The added sprinkles and cute fondant witch legs make these jars a standout dessert that will impress everyone.
Why You’ll Love This Recipe
- Eye-Catching Presentation: The combination of chocolate cake and bright green frosting creates a beautiful visual that is sure to wow your guests.
- Fun for All Ages: Perfect for Halloween parties or family get-togethers, these jars are a hit with kids and adults alike.
- Easy to Customize: Feel free to add your favorite sprinkles or toppings to personalize each jar!
- Portion Control: Individual jars make it easy to serve and enjoy without the mess of cutting a cake.
- Delicious Layers: The contrast of flavors between the moist chocolate cake and the sweet buttercream gives a delightful taste experience.
Tools and Preparation
Before you start making your Witches Brew Halloween Cake Jars, gather your tools. Having everything prepared will streamline the process and ensure you have fun while baking!
Essential Tools and Equipment
- Mixing bowls
- Electric mixer
- Measuring cups and spoons
- Spatula
- 9 jars (for serving)
- Baking pan
- Piping bags (for buttercream)
Importance of Each Tool
- Electric mixer: This tool saves time and effort when whipping buttercream to a fluffy consistency.
- Spatula: A spatula is essential for mixing ingredients thoroughly and scraping down the sides of your bowls.
Ingredients
To create these Witches Brew Halloween Cake Jars, gather the following ingredients:
For the Cake
- 330 g self-raising flour
- 360 g granulated sugar
- 360 g butter
- 6 eggs
- 30 g unsweetened black cocoa powder
- 1½ tsp baking powder
- ½ tsp salt
- 90 ml milk
- 2 tsp vanilla extract
For the Buttercream
- 400 g salted butter
- 800 g powdered sugar (icing sugar)
- 1¼ tsp vanilla extract
- 2 tbsp milk or cream (optional – if the buttercream is too stiff)
- Electric green food coloring (a few drops)
For Decoration
- 250 g orange fondant
- 200 g black fondant
- 1 tbsp CMC powder
- Sprinkles
How to Make Witches Brew Halloween Cake Jars
Step 1: Preheat the Oven
Preheat your oven to 175°C (350°F). Grease your baking pan well so that the cake doesn’t stick.
Step 2: Prepare the Cake Batter
- In a large mixing bowl, cream together the softened butter and granulated sugar until light and fluffy.
- Add in the eggs one at a time, mixing well after each addition.
- In another bowl, whisk together the self-raising flour, black cocoa powder, baking powder, and salt.
- Gradually add this dry mixture into the wet mixture, alternating with milk and vanilla extract. Mix until just combined.
Step 3: Bake the Cake
Pour the batter into your prepared baking pan. Bake for about 50 minutes or until a toothpick inserted in the center comes out clean. Let it cool completely before assembling your jars.
Step 4: Make the Buttercream
- In a separate bowl, beat together salted butter and powdered sugar using an electric mixer until creamy.
- Mix in additional vanilla extract and adjust consistency with milk or cream if needed.
- Add electric green food coloring gradually until you achieve your desired shade.
Step 5: Assemble Your Cake Jars
- Cut cooled cake into small pieces.
- Layer pieces in each jar followed by a layer of green buttercream using a piping bag.
- Repeat layers until jars are filled, finishing with buttercream on top.
Step 6: Decorate
Top off each jar with sprinkles and add fondant witch legs for that perfect Halloween touch!
These Witches Brew Halloween Cake Jars are sure to be a hit at any celebration! Enjoy this festive treat that combines fun, flavor, and creativity!
How to Serve Witches Brew Halloween Cake Jars
Witches Brew Halloween Cake Jars are not only delicious but also visually appealing, making them perfect for festive occasions. Here are some fun serving suggestions to elevate your Halloween dessert experience.
Individual Treats
- Use small mason jars or clear cups to create individual servings that guests can grab and enjoy.
Layered Display
- Arrange the cake jars on a decorative platter with themed decorations like spider webs or mini pumpkins for an eye-catching centerpiece.
Party Favors
- Seal the jars with lids and tie them with ribbon for delightful party favors that guests can take home.
Themed Table Setting
- Match the jars with themed tableware, such as plates and napkins featuring ghosts or witches, for a cohesive look.
Interactive Dessert Station
- Set up a dessert station where guests can assemble their own cake jars by adding layers of cake and frosting, making it a fun activity.
How to Perfect Witches Brew Halloween Cake Jars
Creating the perfect Witches Brew Halloween Cake Jars requires attention to detail. Here are some tips to ensure your jars turn out amazing.
- Use fresh ingredients: Ensure all your baking items are fresh, especially eggs and butter, for the best flavor and texture.
- Layer carefully: When filling your jars, layer the chocolate cake and buttercream evenly for an attractive presentation.
- Chill before serving: Allow the assembled cake jars to chill in the refrigerator for at least 30 minutes before serving. This helps the flavors meld together beautifully.
- Experiment with colors: Feel free to add more food coloring to the buttercream for an even more vibrant green hue that captures the Halloween spirit.
Best Side Dishes for Witches Brew Halloween Cake Jars
Pairing your Witches Brew Halloween Cake Jars with complementary side dishes can enhance your festive spread. Here are some delightful options:
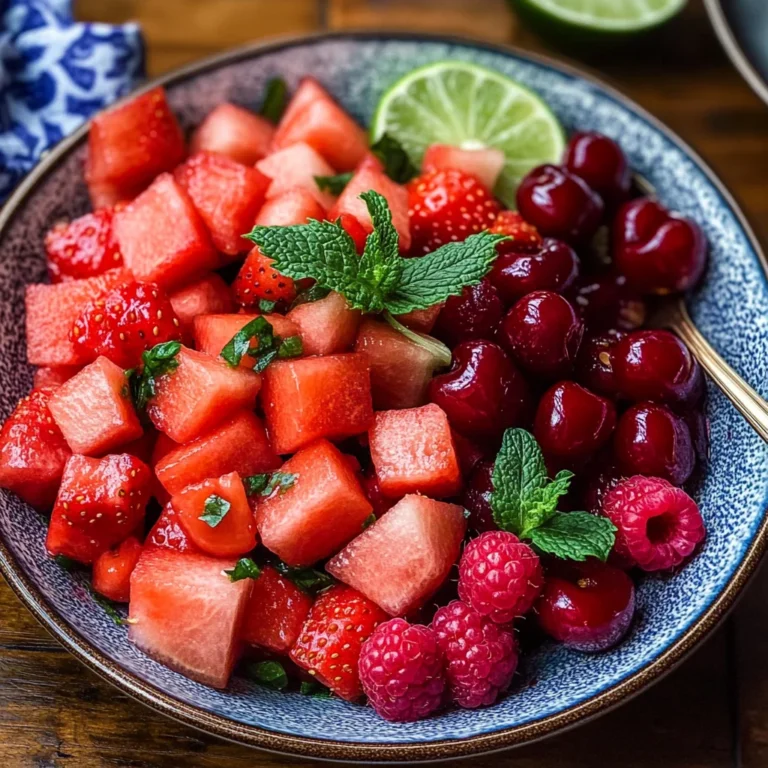
- Spooky Fruit Salad: Mix various seasonal fruits like oranges, apples, and berries; consider using ghost-shaped cookie cutters for added fun.
- Ghoulish Veggie Platter: Serve a variety of colorful vegetables with a green dip resembling witches’ brew made from avocado or spinach.
- Pumpkin Soup: A warm bowl of creamy pumpkin soup can provide a comforting contrast to the sweetness of cake jars.
- Candy Corn Cheese Board: Create a cheese board featuring yellow and orange cheeses along with nuts and crackers, resembling candy corn colors.
- Ghostly Marshmallow Pops: Dip marshmallows in white chocolate and decorate them as ghosts on sticks for a playful treat.
- Monster Rice Crispy Treats: Shape rice crispy treats into monster faces using colorful icing and candy eyes for an easy yet festive snack.
Common Mistakes to Avoid
Making Witches Brew Halloween Cake Jars can be a fun experience, but there are common pitfalls to watch for.
- Bold Ingredient Miscalculations: Double-check your measurements. Using too much or too little of an ingredient can affect the cake’s texture and flavor.
- Bold Overmixing the Batter: Mixing the batter too much can lead to dense cakes. Mix until just combined for light and fluffy results.
- Bold Ignoring Oven Temperature: Every oven is different. Use an oven thermometer to ensure your temperature settings are accurate for even baking.
- Bold Skipping the Cooling Time: Allowing the cake to cool completely before layering is essential. Skipping this step can result in melted buttercream.
- Bold Not Using Proper Containers: Ensure you use jars or containers that can hold moisture and prevent spills. Choose sturdy jars for best results.
Storage & Reheating Instructions
Refrigerator Storage
- Store in airtight containers to keep them fresh.
- Witches Brew Halloween Cake Jars can last up to 5 days in the refrigerator.
Freezing Witches Brew Halloween Cake Jars
- You can freeze these cake jars for up to 2 months.
- Make sure they are well-sealed in freezer-safe containers to avoid freezer burn.
Reheating Witches Brew Halloween Cake Jars
- Oven: Preheat to 350°F (175°C). Place jars in a baking dish with water and heat for about 15 minutes.
- Microwave: Heat individual jars on medium power for 20-30 seconds. Check frequently so they don’t overheat.
- Stovetop: Place jars in a pot with a lid over low heat, warming gently until desired temperature is reached.
Frequently Asked Questions
Here are some commonly asked questions regarding Witches Brew Halloween Cake Jars.
Can I make Witches Brew Halloween Cake Jars ahead of time?
Yes! You can prepare these jars a day or two prior. Just store them properly in the fridge until serving.
What type of food coloring should I use?
Electric green food coloring works best for achieving that vibrant look. Gel colors are recommended as they provide strong pigmentation without watering down your frosting.
How do I customize my Witches Brew Halloween Cake Jars?
Feel free to swap out flavors or colors! You could use red velvet cake instead of chocolate or change the color scheme using different food dyes.
Are there any alternatives for the fondant decorations?
Absolutely! You could use colored chocolate melts or even candy decorations if fondant isn’t available.
How do I serve Witches Brew Halloween Cake Jars at a party?
These jars make excellent individual servings! Just place them on a dessert table and enjoy their vibrant festive look.
Final Thoughts
Witches Brew Halloween Cake Jars are not only visually stunning but also deliciously versatile. This recipe allows you to experiment with flavors and decorations, making it perfect for any Halloween celebration or themed event. Don’t hesitate to customize them according to your tastes—your guests will love these delightful treats!
Witches Brew Halloween Cake Jars
Get ready to enchant your Halloween gatherings with Witches Brew Halloween Cake Jars! These delightful treats are a feast for the eyes and the palate, combining layers of moist chocolate cake and vibrant green buttercream. Perfect for parties or cozy nights at home, each jar is topped with playful sprinkles and whimsical fondant witch legs, making them a standout dessert that will captivate guests of all ages. Easy to customize, these jars offer a fun way to enjoy a classic treat without the mess of traditional cake. Whether you’re hosting a spooky soirée or simply indulging in festive flavors, these cake jars are sure to be a hit!
- Prep Time: 30 minutes
- Cook Time: 50 minutes
- Total Time: 1 hour 20 minutes
- Yield: Approximately 9 servings 1x
- Category: Dessert
- Method: Baking
- Cuisine: American
Ingredients
- 330 g self-raising flour
- 360 g granulated sugar
- 360 g butter
- 6 eggs
- 30 g unsweetened black cocoa powder
- 1½ tsp baking powder
- ½ tsp salt
- 90 ml milk
- 2 tsp vanilla extract
- 400 g salted butter
- 800 g powdered sugar (icing sugar)
- 1¼ tsp vanilla extract
- 2 tbsp milk or plant-based cream (optional)
- Electric green food coloring (a few drops)
- 250 g orange fondant
- 200 g black fondant
- 1 tbsp CMC powder
- Sprinkles
Instructions
- Preheat your oven to 175°C (350°F). Grease a baking pan.
- Cream together softened butter and granulated sugar until fluffy. Add eggs one at a time, mixing well.
- In another bowl, whisk self-raising flour, cocoa powder, baking powder, and salt. Gradually add to the wet mixture with milk and vanilla.
- Pour into the prepared pan and bake for about 50 minutes or until a toothpick comes out clean. Cool completely before layering.
- Beat salted butter and powdered sugar until creamy for the buttercream; add vanilla, adjust with milk if needed, then mix in green food coloring.
- Layer cooled cake pieces and buttercream in jars until filled, finishing with buttercream on top and decorating as desired.
Nutrition
- Serving Size: 1 jar (150g)
- Calories: 450
- Sugar: 45g
- Sodium: 220mg
- Fat: 20g
- Saturated Fat: 12g
- Unsaturated Fat: 7g
- Trans Fat: 0g
- Carbohydrates: 65g
- Fiber: 2g
- Protein: 5g
- Cholesterol: 100mg